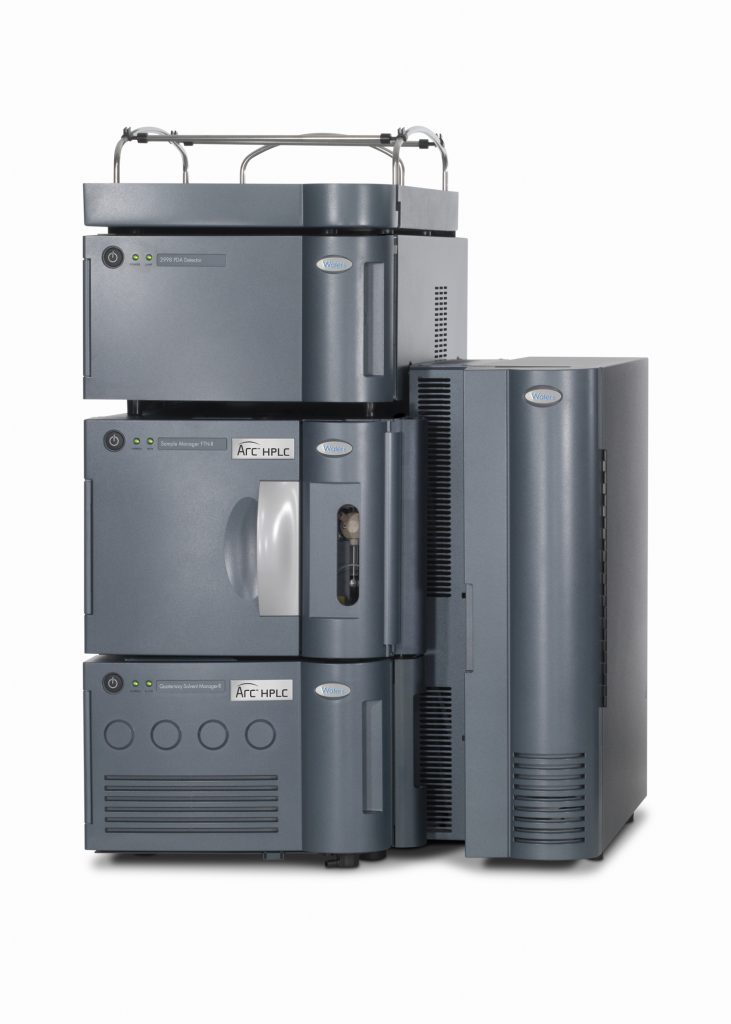
This SOP HPLC WATERS PDA WITH QUARTNARY PUMP most important who gives a detailed outline for the operation of HPLC 1 Waters PDA With Quartnary Pump and will cover the operating procedure, calibration and cleaning of equipment.
PURPOSE:
To describes the operating procedure for operation of HPLC 1 Waters PDA With Quartnary Pump.
SCOPE:
This SOP gives detailed outline for the operation of HPLC 1 Waters PDA With Quartnary Pump and will cover operating procedure, calibration and cleaning of equipment.
RESPONSIBILITY:
QC Analyst is responsible for the operation of equipment and preparing standard operating procedures. It is the responsibility of QC Manager to assist and ensure Operating Procedure as per SOP and to make certain that this SOP is followed in its entirety, reviewed regularly, and revised as necessary.
REFERENCE:
In-House Specifications
MATERIAL AND EQIUPMENT:
HPLC 1 WATERS PDA WITH QUARTNARY PUMP
OPERATING INSTRUCTIONS:
System Start-up Procedure:
SYSTEM CLEANING AND PREPARATION PROCEDURE:
- Daily clean the instrument by damp cloth or duster to remove dust.
- Clean all S/S tubing i-e its connection, inside surrounding of Separations Module and detector with water to remove the deposited buffer and dry it with a duster.
- Before starting the routine analysis, press the direct function key then the “System Prep” button to clean whole system including four lines (A, B, &D), plunger seal, needle seal and injector loop is flushed with solvents.
(Note): DISCONNECT COLUMN BEFORE START THE SYSTEM PREP
- Pass the intermediate solvent (e.g. filtered purified water) through column before analysis for 20 minutes then saturates your system and column for 30 minutes. Make sure to warm up lamp for 1 hour for PDA Detector.
- After completion of work wash the column with respective solvent e.g. filtered water for buffered mobile phase at least one hour, then wash the column with filtered
Methanol: Water / Acetonitrile: Water for half an hour with a composition 30:70

Operating Procedure:
Power on the “2695 Separation Module” by moving the power switch (located at the top of the left side panel) to the (ON) 1 position.
The start-up diagnostics routine performs the following functions and tests:
- CPU board
- Memory (RAM & ROM)
- Keypad
- Display
- External communication
- Digital signal processor (DSP)
- Floppy disk drive
- Once the electronic part of the diagnostics test is complete, the front-panel screen displays the results of the test as shown below:
- Power on the “UV/Visible detector 2489” by pressing On/Off switch located on the front, lower-right corner of the unit.
- After it displays the Startup Diagnostics screen, the detector displays the following series of messages, in sequence, a process that takes about five minutes:Initializing grating
Initializing system
Lighting lamp
Warming time left: n minutes
Homing optical filter
Searching for 656 nm
Optimizing system performance
Finding calibration peaks
Restoring last setup
Completing initialization
Software Operation
- Double click on the “Empower Software” icon on desktop. Empower is used for advanced data acquisition, management, processing, reporting, and data distribution using an embedded, relational database with traceability suitable for a regulated lab environment. The EmpowerTM 3 software window appears for a while and Empower Login dialog box opens on the desktop.
- Login with User name and password
- After Login, below window will appear
Creating New PROJECT
- Click on Configure System to make a New Project
- Select Enabled options. If PDA is available, then click on PDA otherwise uncheck it and let the check remain on system suitability. CLICK NEXTSet access control of the project as mentioned below. Then CLICK NEXT
- Select items to copy for new project as below. Click check on Methods and select REPORT FORMATS project to import reports layouts for new projects. CLICK NEXT
- Give name for your New Project and add comments, then CLICK FINISH
Creating Sample Set Method (SSM)
- Click on RUN SAMPLE
- Select Project in which to acquire data (from Left hand side) and chromatographic from (Right hand side). CLICK OK
- Click File New Sample Set Method Using Sample Set Wizard.
- Select on Create New Sample Set Method using wizard. CLICK NEXT
- Select the type of sample set method to create. CLICK NEXT
- Select location of your standard to be placed. select at start of sample set then Click NEXT
- Select calibration option as mentioned below. CLICK NEXT
- Describe information for your standards. Then click on Create New Method Set
- As you click on create new method set, a new window will appear for instrument method editor, where all instrument method parameters are to define. Click Create New
- Edit all instrument method parameters as per your method. by clicking on PDA 2998 you can edit PDA detector parameters, and by clicking on 2695, you can edit parameters of alliance (pump flow, composition, column & sample temp, etc.)
- After giving complete method parameters, click file -> save as -> give name IM and give password and click save. then close window of instrument method editor
- Then select the IM and CLICK NEXT
- Choose the method for processing, reporting and exporting. As we don’t have any made these methods yet so we will keep setting as below. Then CLICK NEXT
- Name the method set. use your project name MS then give password and CLICK Finish
- Your Method Set (MS) is completed and loaded. After giving information of your standards and creating MS, CLICK NEXT and describe information of sample. Then CLICK NEXT
- You can give Column name which is being used for this sample set. CLICK NEXT
- You can mention column serial no which is being used for SSM. CLICK NEXT
- Give Standard and sample name. You can skip here and mention sample name in sequence table. CLICK NEXT
- Check on Run Only Mode. CLICK NEXT
- View Sample Set Method summary and CLICK FINISH
- Click OK on component Method Editor Window
- OnceSample Set Method is completed, you can save it as
- You can save Sample Method as (Your name Initial and current date DDMMYY) for easy traceability.
- Using Single RUN, click on Single Tab
- Give sample name, select functions (Standard / Sample), specify vial no, injection volume and run time. Then click INJECT.
- Before running your sample set or single injection, you need to wash your column with 100% HPLC grade water for minimum 20 minutes and then then saturate your chromatographic system & column with your mobile phase for minimum 30 minutes.
- NOTE: Make sure to warm up your lamp before starting your analysis. For UV detector, warm up for 30 minutes and for PDA warm up lamp for 1hour.
- To saturate your system & column with mobile phase and method parameters, select you IM (Instrument Method) from IM console and CLICK MONITOR
- You can monitor for 30 minutes or unless you baseline becomes stable. Once it is stabilized, you can abort the monitoring and run your sample set method (SSM)
- Run your sample set method after abort, CLICK on RUN
- Once your sample set (sequence) is completed. Click on Browse Project as below
Processing your data by making PROCESS METHOD
- Select your report Method and CLICK OK
- Below is your processed report and ready for Print. CLICK print icon for printing.
- After completing your analysis, wash your HPLC system including detector with 100%filtered HPLC grade water for minimum 45 minutes.
- After washing with water, leave your HPLC system with 30% Methanol & 70% Water.
- Keep lamp OFF when washing your HPLC system.
- Always use fresh HPLC grade filtered water for washing.
- After washing your HPLC system, power off your HPLC system properly.

