
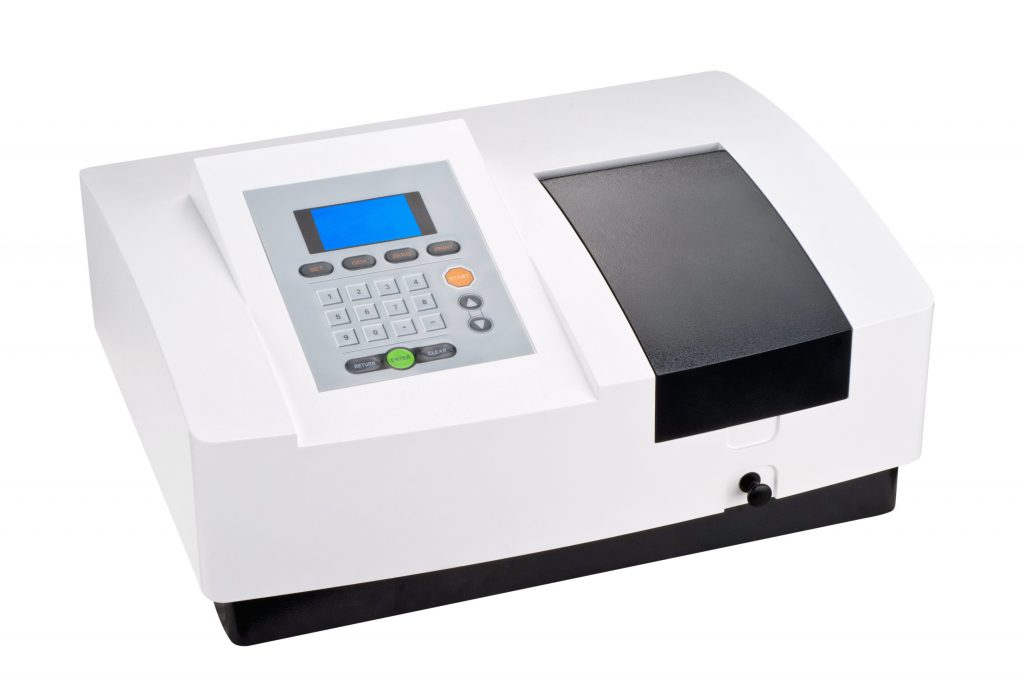
UV/VIS Spectrophotometer Operational SOPs method is used to measure the pharmaceutical and non-pharmaceutical compounds that have detectable peaks in the UV-Vis region
PURPOSE:
To describes the operating procedure for operation of UV/VIS Spectrophotometer.
SCOPE:
This SOP gives detailed outline for the operation of UV/VIS Spectrophotometer and will cover operating procedure of equipment.
RESPONSIBILITY:
QC Analyst is responsible for operation of equipment and preparing standard operating procedure.
It is the responsibility of QC Manager to assist and ensure Operating Procedure’s as per SOP and to make certain that this SOP is followed in its entirety, reviewed regularly and revised as necessary.
REFERENCE:
In-House Specifications
MATERIAL AND EQIUPMENT:
UV/VIS Spectrophotometer
PROCEDURE:
OPERATION:
- Ensure that the instrument is properly connected to the stabilized power supply.
- Switch ON the main power supply switch.
-
Function keys:
- The function keys are used to set instrument parameters and to perform operation functions. When one of the five function keys (F1~F5) is pressed in different working mode, the system executes the corresponding operation, such as parameters setting, deleting, sampling cell setting, printing and dark current correction etc.
-
Display Adjustment hole:
- Used to adjust the contrast of the display with a Փ3 (diameter is 3mm) screwdriver.
-
Numeric keys:
- Used to input numeric values in parameters settings.
-
Edit keys:
- Cursor keys (⇧, ⇩)—Used To Shift the cursor up and down while browsing data, increase and decrease data while setting time.
- Cursor keys ( ⇦, ⇨ )—Used to switch the displayed data while measuring DNA/Protein, Setting time and looking up the data when peak picking.
- Cancel key (“CLE”) ↳–Used to delete the preceding entries or cancel a certain operation.
- Enter Key (“ENTER”) ↲–Used to Confirm and execute the current function, or to end the parameters setting and quit.
-
Operation keys:
- Auto zero key AUTOZERO: Used to set ABS zero (transmittance 100%). In the p photometric mode and the quantitative mode, AUTOZERO set ABS zero only at current wavelength. In spectrum mode, AUTOZERO performs baseline calibration in the set wavelength range.
- Wavelength set key GOTOWL: Used to set current wavelength.
- Start/Stop key START/STOP: Used to start or stop a measurement.
-
Indicator lamp:
Indicate the power supply.
- Switch OFF the instrument when not in use.
-
REFERENCES:
- Not Applicable.
-
ANNEXURES:
- Annexure 1: Instrument overview.
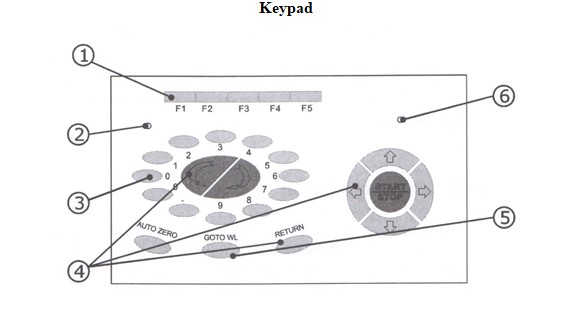
- Annexure 2: Keypad.
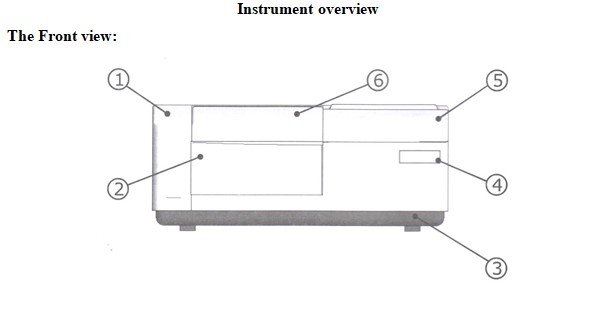
- Instrument cover
- Front baffle of sample compartment—standard front baffle for sample compartment. It should be replaced when using some accessories.
- Chassis—The steel made chassis can greatly reduce vibration, and ensures the credibility of the instrument.
- Instrument label
- Keypad and display—320 × 240 dots high resolution LCD and 27 keystrokes.
- Sample compartment cover—Open the cover to gain access to the sample compartment.

- Light source house cover—Open the cover to gain access to the light source house, where you can replace the deuterium lamp and tungsten lamp.
- Foot packing—Shockproof rubber washer is used.
- Printer interface—Connect to the HP parallel inkjet printers.
- RS-232 interface—Communicate with PC.
- Wiring terminal—Connect to ground wire.
- Outlet—Connect to power supply: AC 220V, 50Hz.
- Fuse—Can be replaced (refer to “Appendix 3 fuse replacement”)
- Power switch
- Power label—Describe the power requirements.
- Instrument nameplate.
- Fan
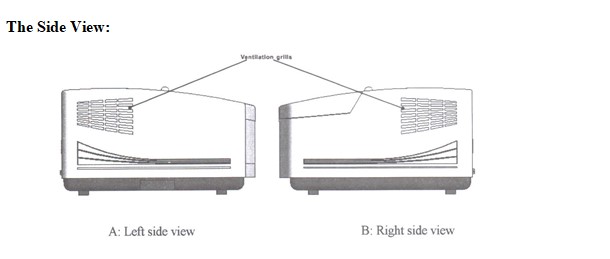
There is no other an interface or labels except the ventilation grills.
-
Function keys:
The function keys are used to set instrument parameters and to perform operation functions. When one of the five function keys (F1~F5) is pressed in different working mode, the system executes the corresponding operation, such as parameters setting, deleting, sampling cell setting, printing and dark current correction etc.
-
Display Adjustment hole:
Used to adjust the contrast of the display with a Փ3 (diameter is 3mm) screwdriver.
-
Numeric keys:
Used to input numeric values in parameters settings.
-
Edit keys:
- Cursor keys ( ⇧, ⇩ )—Used To Shift the cursor up and down while browsing data, increase and decrease data while setting time.
- Cursor keys (⇦,⇨ )—Used to switch the displayed data while measuring DNA/Protein, Setting time and looking up the data when peak picking.
- Cancel key (“CLE”) ↳–Used to delete the preceding entries or cancel a certain operation.
- Enter Key (“ENTER”) ↲–Used to Confirm and execute the current function, or to end the parameters setting and quit. Return Key RETURN—Used to quite the current function and return to the preceding page.
-
Operation keys:
- Auto zero key AUTOZERO: Used to set ABS zero (transmittance 100%). In the p photometric mode and the quantitative mode, AUTOZERO set ABS zero only at current wavelength. In spectrum mode, AUTOZERO performs baseline calibration in the set wavelength range.
- Wavelength set key GOTOWL : Used to set current wavelength.
- Start/Stop key START/STOP : Used to start or stop a measurement.
-
Indicator lamp:
Indicate the power supply.